AutoNDA Implementation Checklist
.png)
Whether you’re sending your first NDA or your 100th with AutoNDA, this short AutoNDA Implementation Checklist will help make sure you’re taking full advantage of the powerful workflow features of our platform.
The Checklist
- Set your NDA variables
- Set your Request and Review rules
- Turn on SimpleLink
- Set Approver and Signer
- Set View, Comment and Start permissions
- Set eSign Integration
- Test Request
- Test SimpleLink
- Promote
- Review
The Guidance
Set your NDA variables: AutoNDA divides rules, variables and settings by workflow. With your free version of AutoNDA, you have one workflow that you’ll need to configure. We recommend starting with variables, as these are the underbelly of your NDA, and will become the defaults for self-serve NDA requests. With the free version of AutoNDA you can set one default purpose, along with other standard variables including jurisdiction, governing law and dispute resolution method. Click to workflow here to set your variables.
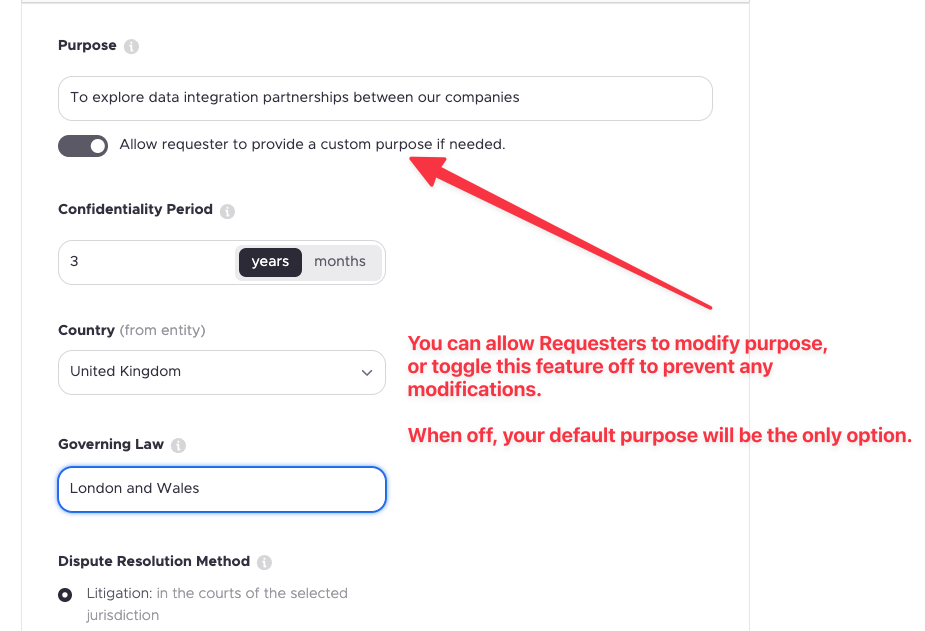

Set your Request and Review rules: Do you want your Requesters to be able to modify your NDA variables? Most AutoNDA users set this option to NO, as they don’t want sales or business teams making decisions on jurisdiction or governing law. They will still be able to modify your default purpose, however. But if you select NO here, they won’t be able to modify any of the other variables. Now, on to your Review rules. If you select YES here, then all self-serve NDA requests will be held for review and approval before going out. We also don’t recommend this option, but it’s available in the instances where you don’t want to give sales the ability to modify variables, but you want to review those changes before they are sent out to the counterparty.
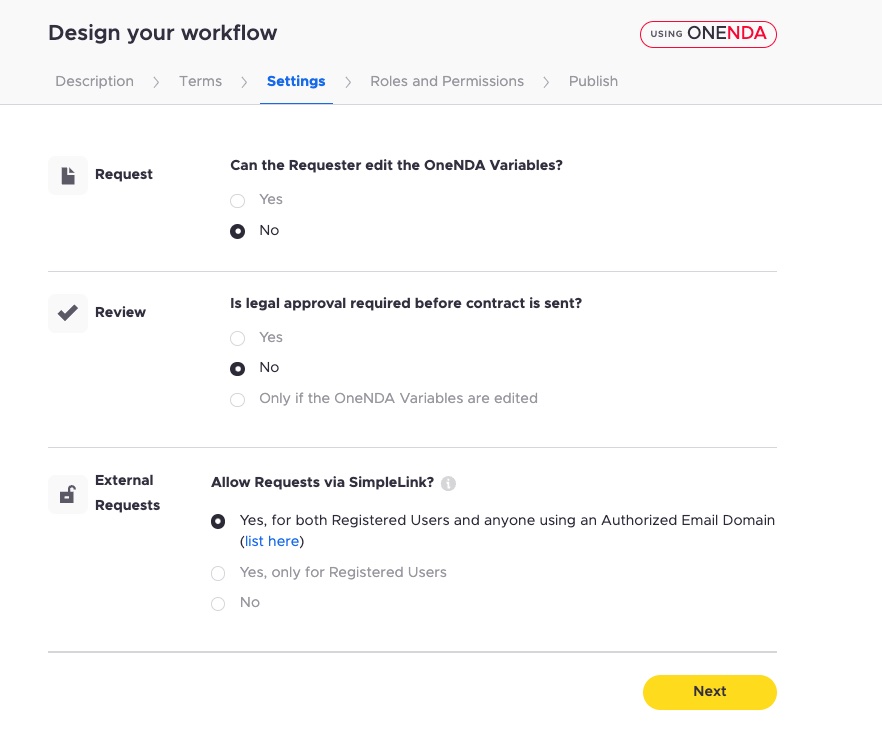
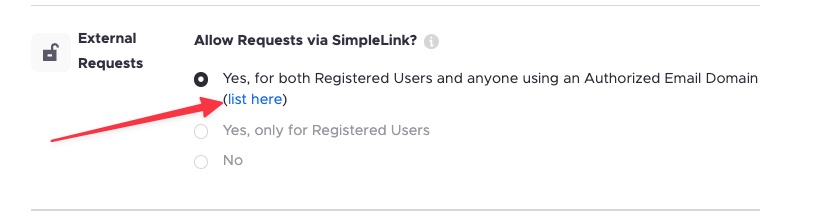
Turn on SimpleLink: For this last feature under “Settings”, we recommend that you select YES to Allow Requests via SimpleLink. This ensures that your sales and business teams can self-serve NDA requests without the need for you to manually invite them to AutoNDA. This is especially important for larger organizations with 20 or more potential requesters. Finally, you will need to follow the “list here” link to authorize your domain. This only takes a minute to complete.
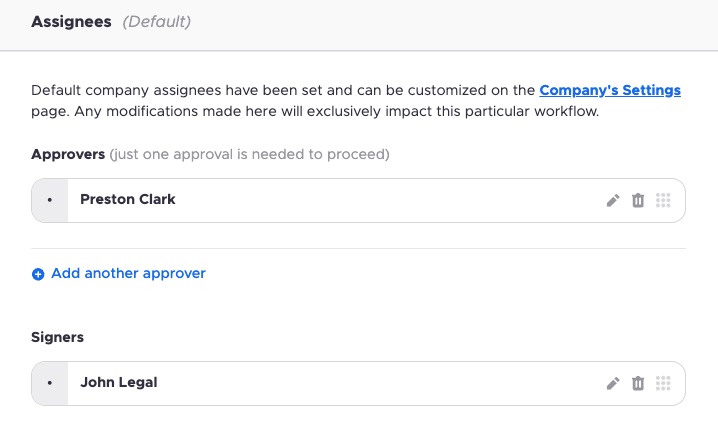
Set Approver and Signer: Under Roles and Permissions, you can select your Approver and Signer. Approver has the authority to release outbound NDAs and negotiate proposed changes via AutoNDA. Your Signer is pretty self-explanatory. For both Approver and Signer, if the respective individual is not already added into AutoNDA, you can add new users by following this link. Once added, you’ll be able to add them as Approver of Signer. Please note that we do offer multiple Approver and Signer options with AutoNDA+, as well as the ability auto-sign where pre-approved NDA variables are accepted by both parties.
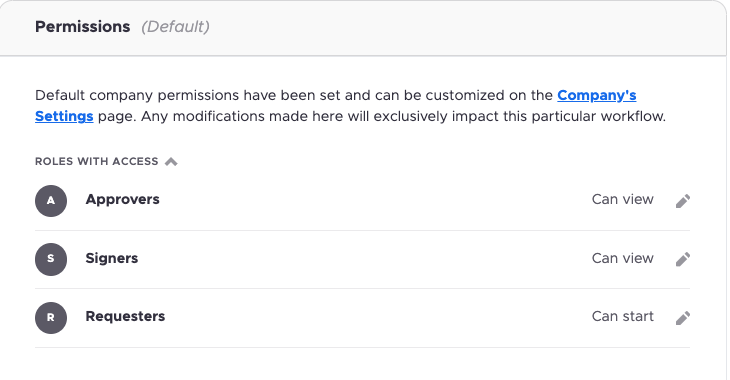
Set View, Comment and Start permissions: Further down the page under Roles and Permissions (link here), you have the ability to limit the rights of each role. For example, you can limit the access your sales team has to your AutoNDA Repository. Our recommendation here is for Approvers and Signers to have View rights, which gives them full access to review ALL NDAs in your NDA Repository. For Requesters (sales and business users), we recommend “Start” only. This will give them the ability to generate NDA Requests and the ability to view their own NDA requests and archives, but only those they requested— not those requested by anyone else.
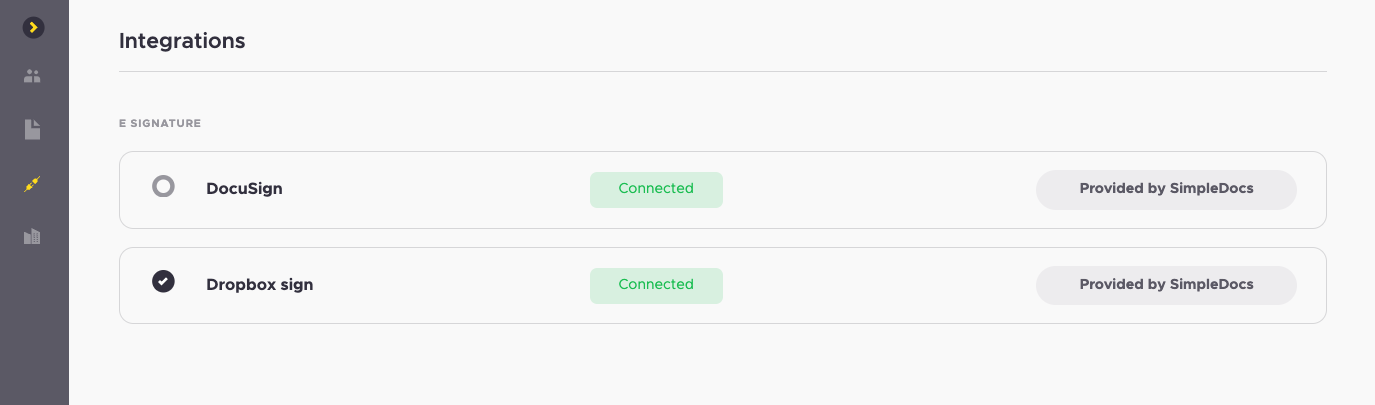
Set eSign Integration: All AutoNDA accounts are pre-loaded with a Dropbox Sign corporate account. You are welcome to use this for testing purposes and to run your first few real NDA automations. But you’ll eventually want to integrate with your own eSign tool, and we make this process extremely simple. Head over to our integration page (link here) and select among our available eSign integration options. At the time of posting, we offer Docusign, Dropbox Sign and Adobe Sign (available 10/20/23). NOTE: AutoNDA integrates with your eSign account at the corporate level, meaning we don’t require integration across your individual business licenses, but instead rely on a central integration through which all signatures will be processed.
Test Request: It’s now time to test your AutoNDA workflow configurations and sent out an NDA. Even if you’ve tested the functionality previously, we recommend doing it again once you’ve completed the configuration steps above. You can test this by sending an NDA to co-workers, or you can send to the SimpleDocs team at [email protected]. We’re hardball negotiators, you can expect a couple proposed changes coming back to you. :)
Test SimpleLink: Assuming you’ve successfully turned on your SimpleLink AND authorized your domain (see Checklist #3 above), you are ready to test the SimpleLink. To do this, you’ll want to copy the link to your clipboard (see visual instructions below) and then share the SimpleLink with someone else in the organization who doesn’t have an AutoNDA account. This could be someone else on the legal team or a sales person willing to test it out. For testing purposes, we recommend giving them very simple instructions. Here’s some sample language to use: “Hello! We’re testing out AutoNDA, it’s a tool that automates the NDA process, and makes it easier for business teams to self-serve NDA requests. If you’re up for testing it out, click on the SimpleLink below, and try generating a test NDA. You can send it to me as the recipient. Once you’ve hit send, please let me know how the experience went for you. Here’s the SimpleLink: XXXXXX”
Promote: Now that your AutoNDA is fully configured, and tested. It’s time to promote it internally. Your goal with AutoNDA is for it to be the front door for all NDA requests. To get there, as you know, will require some promotion and some reinforcement. We’ve put together a sample promotion plan for you to follow here: Promoting AutoNDA
Review: Okay, you did it! AutoNDA has been launched internally. And now it’s time watch it work. Your Requests Dashboard is where you’ll be able to track progress and adoption. And if you’re not seeing the level of adoption, we can help you with other promotional efforts to get the word out. We also offer deeper integrations via AutoNDA+ if you’d like to see AutoNDA inside Salesforce or other popular software tools.
-
Still have questions about your AutoNDA implementation? Schedule a 1:1 implementation call. Click here.